
SproutCore is a revolutionary JavaScript framework for creating client-side desktop-class applications that run in the browser. This tutorial will introduce you to the core concepts within SproutCore by developing a simple Twitter like micro-blog.
This tutorial contains both a screencast and a written tutorial!
Screencast
Written Tutorial
What is SproutCore?
SproutCore - unlike jQuery, which is primarily a DOM library - is a MVC framework for client-side desktop-class applications written in JavaScript and heavily influenced by Cocoa (Apple's Mac OSX development framework). It differs itself from other JavaScript libraries because it focuses on providing all the tools required to build a full desktop-like application in the browser - like routing, view controllers, UI components, data store layer, unit testing and deployment tools. Using SproutCore means moving your business logic client side which significantly decreases latency because your application only needs to reach back to the server for data (and to perform business logic you may not want client side).
Using SproutCore means moving your business logic client side which significantly decreases latency
Step 1 - Installing SproutCore
SproutCore is distributed as a gem. To install SproutCore, simply run sudo gem install sproutcore in the Terminal (other ways to install SproutCore can be found here). Despite SproutCore being a RubyGem and coming bundled with a development server, once deployed, SproutCore is nothing more than pure HTML, JavaScript and CSS. To build an application with SproutCore, you use JavaScript to define, views utilizing bundled UI elements provided by SproutCore or custom views. These UI elements render the HTML for us, and then with SproutCore's CSS framework, called Chance, we can style the UI. Using controllers, we can hook these views up to the data in the application. Lastly, using SproutCore's DataSource model we will hook up the application to CouchDB.
Step 2 - Creating Your First App
- Open the terminal.
- Run
sc-init microblogcreating the base SproutCore application. cd microblog-
sc-serverwhich starts the SproutCore development server. - Open
http://localhost:4020/microblogin your browser and your should see "Welcome to SproutCore!" (Note: you won't need to restart the SC server each time you make changes to your source, just refresh the browser window).


Step 3 - Getting Acquainted With The SproutCore Files
Let's go through each file in the generated SproutCore source and explain what each part does. The source code starts in the apps/microblog folder.
- core.js - contains your applications configuration settings and global singletons.
- main.js - the main starting point of your application it should set the main view, initiate your primary controller and load the required data for the main view.
- resources/loading.rhtml - this HTML is shown while the SproutCore app is loaded and initiated, it's not visible very long as SproutCore loads fairly quickly.
- resources/main_page.js - holds the main page (and it's views) loaded by default, by the code, in main.js.
Step 4 - Setting Up The Model
Before we can start building the UI, the SproutCore application needs some data. Let's begin by defining the model. SproutCore comes with a handy model generator. Run sc-gen model Microblog.posts to generate the base model JavaScript files for the post objects. We need to tell SproutCore about the specific data the post objects will contain. Go ahead and open apps/microblog/models/posts.js and add the attributes below.
1 |
|
2 |
Microblog.Posts = SC.Record.extend( |
3 |
/** @scope Microblog.Posts.prototype */ { |
4 |
|
5 |
post: SC.Record.attr(String), |
6 |
published: SC.Record.attr(Number) |
7 |
}) ; |
Microblog.Posts extends SC.Record and names the data in which the post objects should contain. We use methods provided by SproutCore to define the types of data we expect in each attribute.
Step 5 - Adding Fixture Data
In this tutorial, we will initially use Fixtures to populate our model rather than complicating ourselves with a backend server just yet. Throughout the article, if we make changes to data in the application through the UI, it will not persist if we reload the application - until we've added data persistence, via CouchDB. Open apps/microblog/fixtures/posts.js where we will specify some dummy data; insert the data as below.
1 |
|
2 |
sc_require('models/posts'); |
3 |
|
4 |
Microblog.Posts.FIXTURES = [ |
5 |
{
|
6 |
guid: 1, |
7 |
post: "Wow, Nettuts rocks!", |
8 |
published: 1297986988 |
9 |
},
|
10 |
{
|
11 |
guid: 2, |
12 |
post: "Apple's MobileMe was built using SproutCore", |
13 |
published: 1297987009 |
14 |
},
|
15 |
{
|
16 |
guid: 3, |
17 |
post: "Checkout this awesome JavaScript application framework called SproutCore", |
18 |
published: 1298159746 |
19 |
}
|
20 |
];
|
To verify that our model is working correctly, we can call the SproutCore data methods from within a JavaScript console. Reload the page, open the console and execute posts = Microblog.store.find(Microblog.Posts). This should load all the posts fixtures into the posts variable. We need to iterate the posts variable with the SproutCore getEach method to view anything useful. Execute posts.getEach('post') to view all the posts.
Step 6 - Laying Out The Interface
We are going to jump ahead a bit now and build the UI. The reason for doing so is because SproutCore uses data binding to attach the values of UI elements to JavaScript objects; the result of these bindings is the values in the bound JavaScript objects are inserted into the HTML as you'd expect, but with one difference: a link is made between its value and the object. Any subsequent updates to the object in the JavaScript will be automatically reflected in the UI. Thus, we are going to build the UI first, and then implement a controller to bind the data to that UI. Let's get started: open the resources/main_page.js file, and let's give our application a top level navigation toolbar, and a list view.
1 |
|
2 |
Microblog.mainPage = SC.Page.design({ |
3 |
mainPane: SC.MainPane.design({ |
4 |
childViews: 'topView postView contentView'.w(), // SC helper method splits string to array. |
5 |
|
6 |
topView: SC.ToolbarView.design({ |
7 |
layout: { top: 0, left: 0, right: 0, height: 40 }, |
8 |
anchorLocation: SC.ANCHOR_TOP |
9 |
}),
|
10 |
|
11 |
postView: SC.View.design({ |
12 |
childViews: 'form'.w(), |
13 |
layout: { top: 40, height: 75 }, |
14 |
backgroundColor: 'white', |
15 |
|
16 |
form: SC.View.design({ |
17 |
layout: { left: 200, right: 200 }, |
18 |
backgroundColor: "black" |
19 |
})
|
20 |
}),
|
21 |
|
22 |
contentView: SC.ScrollView.design({ |
23 |
hasHorizontalScroller: NO, |
24 |
layout: { top: 115, bottom: 0, left: 0, right: 0 }, |
25 |
contentView: SC.ListView.design({ |
26 |
|
27 |
})
|
28 |
})
|
29 |
})
|
30 |
});
|
Your SproutCore application can have more than one page, but here you can see that we've define just the one page. Within this page, we define three child views; we've defined them both in the childViews attribute and then specified their contents within the object. The topView we define as a ToolbarView and anchor it to the top of the page. You'll notice that we haven't specified a width; this actually tells SproutCore that we want it to fill the available space and resize with the browser window.
Next, the postView we define as a standard View, which is full width, and give it a single sub view form. This will contain the microblog posting form. We don't specify a width, but we instruct the view to be 200 pixels from the right and 200 pixels from the left, making the view narrower than the browser window, but maintaining the auto resizing functionality. The main content lives in contentView, which we've defined as a ScrollView. The content of this ScrollView will be a ListView, which will contain our microblog posts.


Step 7 - Adding Controls
Now that we've got the initial layout done, let's add a form to allow a user to add posts.
1 |
|
2 |
Microblog.mainPage = SC.Page.design({ |
3 |
mainPane: SC.MainPane.design({ |
4 |
childViews: 'topView postView contentView'.w(), // SC helper method splits string to array. |
5 |
|
6 |
topView: SC.ToolbarView.design({ |
7 |
childViews: "appName".w(), |
8 |
layout: { top: 0, left: 0, right: 0, height: 40 }, |
9 |
anchorLocation: SC.ANCHOR_TOP, |
10 |
|
11 |
appName: SC.LabelView.design({ |
12 |
layout: { top: 5, left: 5, width: 100 }, |
13 |
displayValue: "Microblog App", |
14 |
layerId: "mb-logo" // HTML id attribute |
15 |
})
|
16 |
}),
|
17 |
|
18 |
postView: SC.View.design({ |
19 |
childViews: 'form'.w(), |
20 |
layout: { top: 40, height: 150 }, |
21 |
backgroundColor: 'white', |
22 |
|
23 |
form: SC.View.design({ |
24 |
childViews: 'postContent post'.w(), |
25 |
layout: { left: 200, right: 200 }, |
26 |
|
27 |
postContent: SC.TextFieldView.design({ |
28 |
layout: { top: 10, left: 10, right: 10, height: 60 }, |
29 |
isTextArea: YES, |
30 |
hint: "What's on your mind?" |
31 |
}),
|
32 |
|
33 |
post: SC.ButtonView.design({ |
34 |
layout: { top: 80, right: 10, width: 100 }, |
35 |
title: "Post", |
36 |
isDefault: YES |
37 |
})
|
38 |
})
|
39 |
}),
|
40 |
|
41 |
contentView: SC.ScrollView.design({ |
42 |
hasHorizontalScroller: NO, |
43 |
layout: { top: 150, bottom: 0, left: 0, right: 0 }, |
44 |
contentView: SC.ListView.design({ |
45 |
|
46 |
})
|
47 |
})
|
48 |
})
|
49 |
});
|
The first thing we've added is a SC.LabelView to the toolbar with the title "Microblog App". Next, we've modified the form subview to include two child views, first postContent, which is a SC.TextFieldView and enabled isTextArea which makes it a multiline textarea. Secondly, we've added a SC.ButtonView, which we'll assign an action that will add the post when it's clicked. These both are standard SproutCore UI elements. SproutCore has a comprehensive UI catalog baked right in, take a look at the kitchen sink example to gain an idea of what's included. All of these elements can be themed with CSS using SproutCore's theme framework.


Step 8 - Binding The Posts
Let's bind the posts data in the Microblog.Posts.FIXTURES to the SC.ListView within the app so we can see the posts. First we need to create a controller. Run the SproutCore generator like below to produce a boilerplate SC.ArrayController.
1 |
|
2 |
sc-gen controller Microblog.postsController SC.ArrayController |
We don't need to do anything with the generated controller files at the moment, so we are going to leave them alone. SC.ArrayController and SC.ObjectController actually act as proxies to their contents under the hood of SproutCore. You can bind directly to the controller as if you were binding to its contents. As you'll see in a moment, we'll set the content of this controller to the posts. This controllers content (the posts) will be bound to the SC.ListView, which will display them. Because the controller acts as a proxy, we can set a new array of posts to the controllers content (say posts 10 - 20 for example) and the UI will automatically update. Any changes that are also made to the underlying data set (the posts array) will be reflected by the UI automatically.
Now we need to tell the view about this controller and create the binding. Open main_page.js where all the view code lives and adjust the contentView to below.
1 |
|
2 |
contentView: SC.ScrollView.design({ |
3 |
hasHorizontalScroller: NO, |
4 |
layout: { top: 150, bottom: 0, left: 0, right: 0 }, |
5 |
contentView: SC.ListView.design({ |
6 |
contentBinding: "Microblog.postsController.arrangedObjects", |
7 |
selectionBinding: "Microblog.postsController.selection" |
8 |
})
|
9 |
})
|
Now the UI is bound to the contents of Microblog.postsController. Remember: postsController acts as a proxy to its contents. At the moment, if we run the application, we have no data set in postsController and, thus, the SC.ListView is still empty. We need to put data into the controller - we are going to do this as soon as the application starts, so open main.js and add the following to the main function.
1 |
|
2 |
var posts = Microblog.store.find(Microblog.Posts); |
3 |
Microblog.postsController.set("content", posts); |
Reload the browser, and you should see something like the image below:


Step 9 - Creating The Post List View
Right now, the SC.ListView renders each post object as a string - not particularly useful for users. In this step, we are going to extend SC.View to provide our own view/html for each row in the SC.ListView.
First, open the Terminal and cd to your application directory and run:
1 |
|
2 |
sc-gen view Microblog.PostListView |
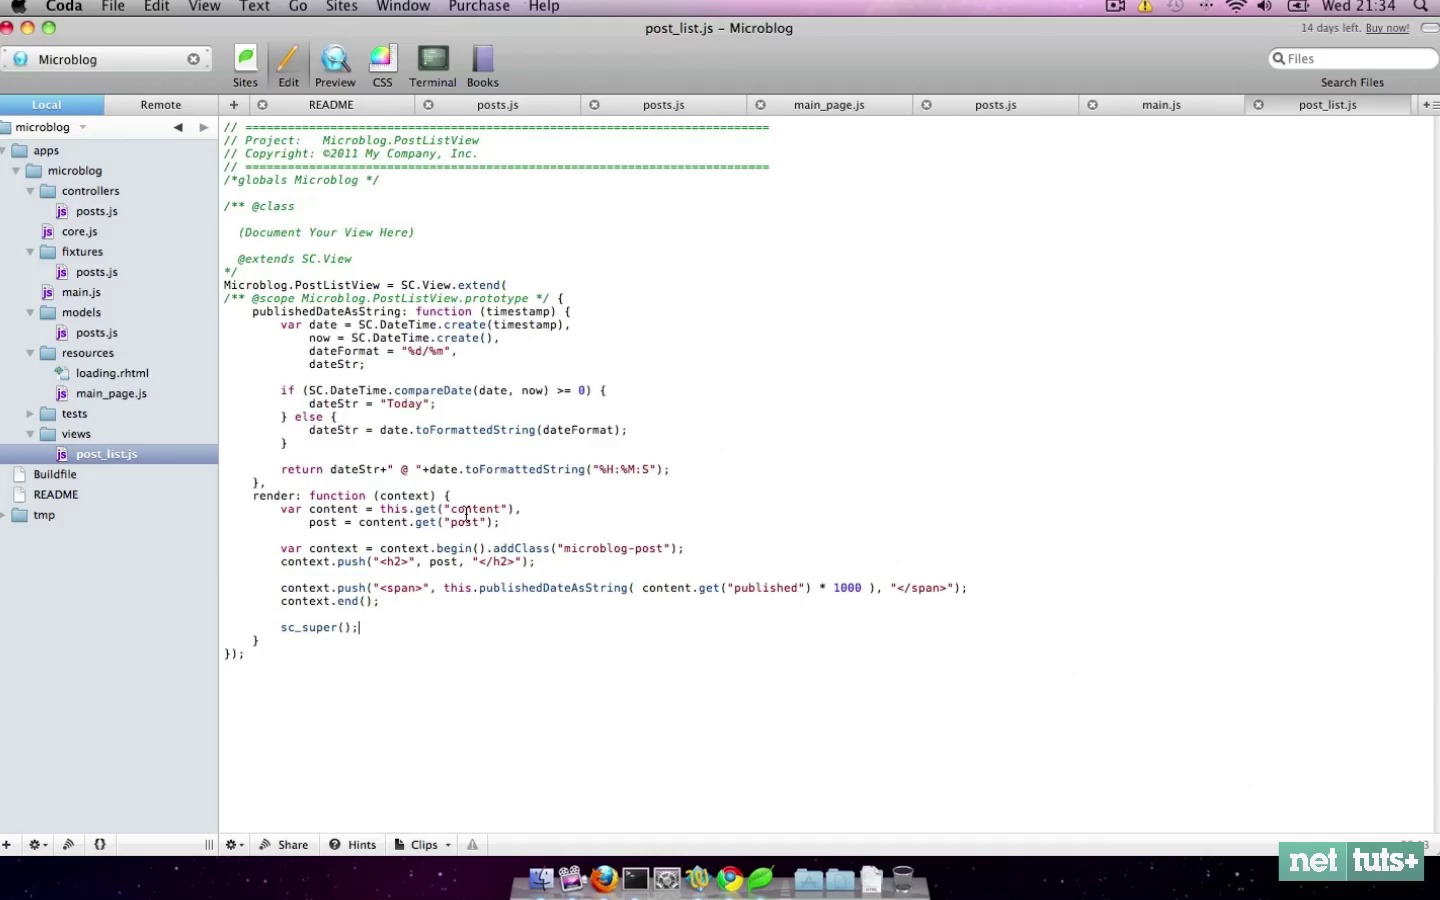
Change the generated view template to look like below:
1 |
|
2 |
Microblog.PostListView = SC.View.extend( |
3 |
/** @scope Microblog.PostListView.prototype */ { |
4 |
publishedDateAsString: function (timestamp) { |
5 |
var date = SC.DateTime.create(timestamp), |
6 |
now = SC.DateTime.create(), |
7 |
dateFormat = "%d/%m", |
8 |
dateStr; |
9 |
|
10 |
if (SC.DateTime.compareDate(date, now) >= 0) { |
11 |
dateStr = "Today"; |
12 |
} else { |
13 |
dateStr = date.toFormattedString(dateFormat); |
14 |
}
|
15 |
|
16 |
return dateStr+" @ "+date.toFormattedString("%H:%M:%S"); |
17 |
},
|
18 |
render: function (context) { |
19 |
var content = this.get("content"), |
20 |
post = content.get("post"); |
21 |
|
22 |
var context = context.begin().addClass("microblog-post"); |
23 |
context.push("<h2>", post, "</h2>"); |
24 |
|
25 |
context.push("<span>", this.publishedDateAsString( content.get("published") * 1000 ), "</span>"); |
26 |
context.end(); |
27 |
|
28 |
sc_super(); |
29 |
}
|
30 |
});
|
The publishedDateAsString() method is a helper that compares the published date to today's date and returns "Today @ 12:00:00" instead of "17/03 @ 12:00:00". It uses SproutCore's SC.DateTime object to format and compare the dates. Have a look at the API documentation for more information on this object. The render function is where we define our custom view and its HTML. Passed into the render function is the views render context. The render function is called initially when the view is drawn and after any subsequent updates to the data. At the top of the render function we get the content object of this list view row and the post data. Then, we begin our rendering context with context.begin(), which defines a new container div.
We're also adding a new CSS class to this div microblog-post using addClass(). Inside this context, we push two more elements, <h2> which contains the post and <span>, which uses the publishedDateAsString() to format the published date. Note: we store the date in seconds, and, before we pass the published date to publishedDateAsString(), we convert it to milliseconds. Once we've completed the intervals of the single list view row, we call context.end(), which closes the render context and sc_super() to call the super's render() method.
Next, we need to tell the SC.ListView to use the custom list view row we've defined. Open main_page.js and change the contentView to below:
1 |
|
2 |
contentView: SC.ScrollView.design({ |
3 |
hasHorizontalScroller: NO, |
4 |
layout: { top: 150, bottom: 0, left: 0, right: 0 }, |
5 |
backgroundColor: "white", |
6 |
contentView: SC.ListView.design({ |
7 |
layout: { left: 200, right: 200 }, |
8 |
contentBinding: "Microblog.postsController.arrangedObjects", |
9 |
selectionBinding: "Microblog.postsController.selection", |
10 |
exampleView: Microblog.PostListView, |
11 |
rowHeight: 60 |
12 |
})
|
13 |
})
|
The exampleView attribute links to the custom view object and is used when rendering the list view rows. We've also given the SC.ListView the same right and left margin.


Step 10 - Adding a New Post
Let's hook up the form so that, when submitted a new post, object is created. Open controllers/posts.js, which contains Microblog.postsController and add another method called addPost to the controller as defined below.
1 |
|
2 |
Microblog.postsController = SC.ArrayController.create( |
3 |
/** @scope Microblog.postsController.prototype */ { |
4 |
addPost: function () { |
5 |
var postField = Microblog.mainPage.mainPane.get("contentField"), |
6 |
postContent = postField.getFieldValue(), |
7 |
published = new Date().getTime() / 1000; |
8 |
|
9 |
var newPost = Microblog.store.createRecord(Microblog.Posts, { |
10 |
post: postContent, |
11 |
published: published |
12 |
});
|
13 |
|
14 |
postField.setFieldValue(''); // Rest the post field value. |
15 |
|
16 |
return YES; |
17 |
}
|
18 |
}) ; |
In this method, we use a SC.outlet to get the value of the SC.TextFieldView within our UI and create a new record using SproutCore's DataSource of the type Microblog.Posts. After creating the object, we reset the field's value to an empty string.
Next, open up main_page.js and hook up the "Post" button to the addPost method on the controller.
1 |
|
2 |
post: SC.ButtonView.design({ |
3 |
layout: { top: 80, right: 10, width: 100 }, |
4 |
title: "Post", |
5 |
isDefault: YES, |
6 |
target: "Microblog.postsController", |
7 |
action: "addPost" |
8 |
})
|
We define the target attribute as the Microblog.postsController, and the action is the new method addPost on that controller.
Finally, to make this all work, we need to define a SC.outlet on the mainPane object so that the addPost method can access the SC.TextFieldView object within the view. Add the following property to Microblog.mainPage.mainPane, which defines an outlet called contentField.
1 |
|
2 |
contentField: SC.outlet("postView.form.postContent"), |
The final code within main_page.js should appear as shown below:
1 |
|
2 |
Microblog.mainPage = SC.Page.design({ |
3 |
mainPane: SC.MainPane.design({ |
4 |
contentField: SC.outlet("postView.form.postContent"), |
5 |
|
6 |
childViews: 'topView postView contentView'.w(), // SC helper method splits string to array. |
7 |
|
8 |
topView: SC.ToolbarView.design({ |
9 |
childViews: "appName".w(), |
10 |
layout: { top: 0, left: 0, right: 0, height: 40 }, |
11 |
anchorLocation: SC.ANCHOR_TOP, |
12 |
|
13 |
appName: SC.LabelView.design({ |
14 |
layout: { top: 5, left: 5, width: 100 }, |
15 |
displayValue: "Microblog App", |
16 |
layerId: "mb-logo" // HTML id attribute |
17 |
})
|
18 |
}),
|
19 |
|
20 |
postView: SC.View.design({ |
21 |
childViews: 'form'.w(), |
22 |
layout: { top: 40, height: 150 }, |
23 |
backgroundColor: 'white', |
24 |
|
25 |
form: SC.View.design({ |
26 |
childViews: 'postContent post'.w(), |
27 |
layout: { left: 200, right: 200 }, |
28 |
|
29 |
postContent: SC.TextFieldView.design({ |
30 |
layout: { top: 10, left: 10, right: 10, height: 60 }, |
31 |
isTextArea: YES, |
32 |
fieldKey: "content", |
33 |
hint: "What's on your mind?" |
34 |
}),
|
35 |
|
36 |
post: SC.ButtonView.design({ |
37 |
layout: { top: 80, right: 10, width: 100 }, |
38 |
title: "Post", |
39 |
isDefault: YES, |
40 |
target: "Microblog.postsController", |
41 |
action: "addPost" |
42 |
})
|
43 |
})
|
44 |
}),
|
45 |
|
46 |
contentView: SC.ScrollView.design({ |
47 |
hasHorizontalScroller: NO, |
48 |
layout: { top: 150, bottom: 0, left: 0, right: 0 }, |
49 |
backgroundColor: "white", |
50 |
contentView: SC.ListView.design({ |
51 |
layout: { left: 200, right: 200 }, |
52 |
contentBinding: "Microblog.postsController.arrangedObjects", |
53 |
selectionBinding: "Microblog.postsController.selection", |
54 |
exampleView: Microblog.PostListView, |
55 |
rowHeight: 60 |
56 |
})
|
57 |
})
|
58 |
})
|
59 |
});
|
After making these adjustments, reload the browser and begin adding posts.


Step 11 - Hooking Up CouchDB
At the moment, the data we load into our application comes from hardcoded Fixtures. These are perfect for testing but not suitable for production, because any changes we make don't persist. SproutCore uses SC.DataSource to interact with a server-side data store. It's configured by default to use an API following the REST convention. In this step, we are going to extend SC.DataSource and override key methods allowing us to use CouchDB. CouchDB has a RESTful API interface out of the box, so it's naturally a perfect fit for SproutCore's SC.DataSource. For more information on CouchDB have a look at this excellent CouchDB introduction on Nettuts+. We only need to make a few modifications in our SC.DataSource to allow SproutCore to handle CouchDB's revision system and slightly different URL schema. Let's get started by setting up the database.
- Head over to www.couchone.com/get and download CouchDB for your operating system.
- Open the CouchDB application.
- Create a database called
microblog. - Click the select box labeled view and select temporary view. This will allow us to create a view to display all the posts.
-
Within the map function textarea, enter the below function.
1
2
function(doc) {
3
if (doc.post && doc.published) {
4
emit(doc._id, doc);
5
}6
} - Click "Save As" in the bottom right, and call both the design document and the view posts.
If any of this is unfamiliar, I recommend you checkout the CouchDB introduction on Nettuts+.
Now that we have our database setup, we are ready to extend SC.DataSource. Using the terminal, run the below command from within your applications root directory.
1 |
|
2 |
sc-gen data-source Microblog.PostsDataSource |
Now we should have a boilerplate SC.DataSource within data_sources/posts.js. Open this file. First, we need to define a query for retrieving our data. At the top of data_sources/posts.js and outside of the Microblog.PostsDataSource construct, add the code detailed below.
1 |
|
2 |
sc_require('models/posts'); |
3 |
|
4 |
Microblog.POSTS_QUERY = SC.Query.local(Microblog.Posts, { |
5 |
orderBy: 'published DESC' |
6 |
});
|
This defines a custom query that will ensure that we get all posts and order them by their published date. Next, add some helper methods to the SC.DataSource subclass as defined below.
1 |
|
2 |
// DB name
|
3 |
_dbname: "microblog", |
4 |
|
5 |
getPath: function (resource) { |
6 |
return "/"+this._dbname+"//"+resource; |
7 |
},
|
8 |
getView: function (view, queryString) { |
9 |
return "/"+this._dbname+"/_design/"+view+"/_view/"+view+"/?"+queryString; |
10 |
},
|
As you can see, we store the db name in a "private" variable. You could add a closure if you want to be thorough. The getPath() and getView() functions abstract the resource to path mapping. We can call getView() with any view name and get the correct URL for that resource on the CouchDB instance.
Now, let's implement some methods to retrieve the posts from CouchDB. Amend the fetch() method and add didFetchPosts() as detailed below.
1 |
|
2 |
fetch: function(store, query) { |
3 |
if (query === Microblog.POSTS_QUERY) { |
4 |
SC.Request.getUrl(this.getView("posts", "descending=true")).json() |
5 |
.header("Accept", "application/json") |
6 |
.notify(this, "didFetchPosts", store, query) |
7 |
.send(); |
8 |
|
9 |
return YES; |
10 |
}
|
11 |
|
12 |
return NO; |
13 |
},
|
14 |
|
15 |
didFetchPosts: function(res, store, query) { |
16 |
if (SC.ok(res)) { |
17 |
var couchResponse = SC.json.decode( res.get('encodedBody') ), |
18 |
posts = couchResponse.rows.getEach("value") |
19 |
ids = couchResponse.rows.getEach("key"); |
20 |
|
21 |
store.loadRecords(Microblog.Posts, posts, ids); |
22 |
store.dataSourceDidFetchQuery(query); // Notify app of win. |
23 |
} else { |
24 |
store.dataSourceDidErrorQuery(query, res); // Notify app of fail. |
25 |
}
|
26 |
},
|
The fetch() method ensures that the query is supported, and then, using SC.Request, makes a request to CouchDB for the posts view we specified earlier. Upon the request being performed, we ask that SproutCore notify the didFetchPosts() method with the result. Within didFetchPosts(), we first check that the response went ok. If it didn't, we respond with an error, accordingly. On the other hand, if the response was successful, we iterate over the results, getting all the posts and IDs and then load the records. After loading the records, we notify any listeners that the data source did fetch some results. In doing so, this automatically updates our UI, because of the data binding we initially setup.
Next, we need to handle a new post, making sure that we add the post to CouchDB. Again in Microblog.PostsDataSource, add the following methods.
1 |
|
2 |
createRecord: function(store, storeKey) { |
3 |
// Check we want to store the correct type of record.
|
4 |
if (SC.kindOf(store.recordTypeFor(storeKey), Microblog.Posts)) { |
5 |
SC.Request.postUrl(this.getPath("/")).json() |
6 |
.header("Accept", "application/json") |
7 |
.notify(this, this.didCreatePost, store, storeKey) |
8 |
.send(store.readDataHash(storeKey)); |
9 |
|
10 |
return YES; |
11 |
}
|
12 |
|
13 |
return NO ; // return YES if you handled the storeKey |
14 |
},
|
15 |
|
16 |
didCreatePost: function (res, store, key) { |
17 |
var couchResponse = this.handleCouchResponse(res); |
18 |
if (couchResponse.ok) { |
19 |
// Copy CouchDB _id and _rev into Microblog object/document.
|
20 |
var doc = store.readDataHash(key); |
21 |
doc._id = couchResponse.id; |
22 |
doc._rev = couchResponse.rev; |
23 |
|
24 |
store.dataSourceDidComplete(key, doc, doc._id); |
25 |
} else { |
26 |
store.dataSourceDidError(key, res); |
27 |
}
|
28 |
},
|
29 |
|
30 |
handleCouchResponse: function (res) { |
31 |
if (SC.ok(res)) { |
32 |
var couch = SC.json.decode( res.get("encodedBody") ); |
33 |
if (couch.ok == YES) { |
34 |
return { "ok": true, "id": couch.id, "rev": couch.rev }; |
35 |
} else { |
36 |
return { "error": true, "response": res }; |
37 |
}
|
38 |
}
|
39 |
|
40 |
return { "error": true, "reponse": "Unkown error occurred." }; |
41 |
},
|
createMethod() firstly ensures that we have been passed a record of the correct type before saving. Then it makes a POST request to CouchDB with the post object as its data. Once again, we attach a method to be notified when the request is over. didCreatePost() uses the helper method handleCouchResponse(), which first checks if SproutCore found the response OK, and then interrogates the returned data further to ensure that the insert was performed successfully by CouchDB. If everything went correctly, we return a object with the new document ID and revision number. didCreatePost() continues to execute if the document was created successfully. If it failed, we notify any listeners of the failure. The method then copies the ID and revision number into the local document within SproutCore and notifies any listeners of the new document. Once again, the UI will automatically update once the new document has been inserted into the posts array.
Next, we need to modify the main.js file to use the new load query as below.
1 |
|
2 |
var posts = Microblog.store.find(Microblog.POSTS_QUERY); |
3 |
Microblog.postsController.set("content", posts); |
And, modify core.js to use the correct data source object.
1 |
|
2 |
Microblog = SC.Application.create( |
3 |
/** @scope Microblog.prototype */ { |
4 |
|
5 |
NAMESPACE: 'Microblog', |
6 |
VERSION: '0.1.0', |
7 |
|
8 |
store: SC.Store.create({ |
9 |
commitRecordsAutomatically: YES |
10 |
}).from("Microblog.PostsDataSource") |
11 |
}) ; |
Lastly, we must add a proxy to the SproutCore BuildFile in the main application directory, telling SproutCore to look for CouchDB on a different port. Add the below proxy to your BuildFile
1 |
|
2 |
proxy '/microblog', :to => 'localhost:5984' |
And, restart your SproutCore server.
If you reload your browser, you should see no posts. This makes sense seeing as their are no documents in the CouchDB database yet. Go ahead and make a post, reload the browser and you should still see your post. You can also check with Futon, CouchDB's administration panel to see the resulting documents in the database.


Conclusion
In this tutorial, I introduced you to some of the key concepts within SproutCore and build a simple Twitter like microblog application. Lastly we took full advantage of SproutCore's client side framework and CouchDB's RESTful interface to produce a full desktop like application, with data persistence, without a server-side application layer. Thank you so much for reading!


