|
HTML5
introduces an element called a "canvas" on which we can use JavaScript
to draw. This offers a quick and easy approach to drawing dynamic
content. This article will compare this relatively new (and not yet
cross-browser compatible) option for drawing to Adobe Flash's
ActionScript 3. JavaScript and ActionScript have common roots as they
are both dialects of ECMAScript.
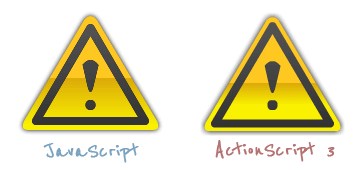
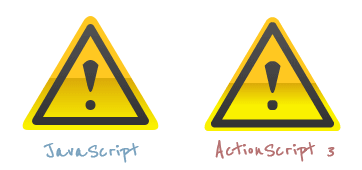
For
this article we are going to draw something with a little complexity to
better compare the two languages. I have chosen a warning icon I made
in Photoshop.
An Initial Difference
As
we dive right into the code try not to be too concerned about the math.
The point of this article is not to explain the trigonometry behind a
triangle, just to compare how we draw the triangle. That said, the
first thing we do is declare a few variables.
var phi = Math.tan((this.width/2) / this.height);
var x = this.innerBorder / Math.cos(phi);
var y = x / Math.tan(phi);
var gamma = Math.sqrt(Math.abs(this.innerBorder*this.innerBorder-x*x));
var phi:Number = Math.tan((iconWidth/2) / iconHeight);
var x:Number = innerBorder / Math.cos(phi);
var y:Number = x / Math.tan(phi);
var gamma:Number = Math.sqrt(Math.abs(innerBorder*innerBorder - x*x));
The code is similar in both languages, but two differences appear immediately and will be consistent throughout this article:
- Type Declaration:
- JavaScript
is loosely typed, so we can't declare a variable's data type, like we
can in ActionScript. For example, in the code above:
var phi:Number declares that variable phi
is a number. Trying to assign it as anything else will throw an error.
It's worth noting that ActionScript 3 does not require type
declaration, but it's generally good practice.
- Use of the "this" keyword:
- In JavaScript you will see properties like
width preceded by the keyword "this" as in this.keyword. You can do this is ActionScript, but it is optional.
Basic Shape: A Triangular Path
The icon we are drawing has three major components:
- Background:
- A triangle with rounded corners, a gradient fill, and a subtle shadow.
- Inner Border:
- A smaller triangle border inside of the background.
- Exclamation Point:
- A bang character "!" inside the center of the icon.
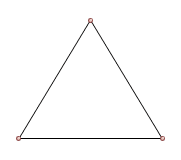
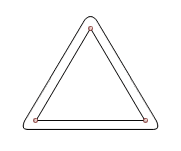
Since
both JavaScript and ActionScript support paths, we will use paths to
define our shapes. Let us start with the background. It is a triangle
consisting of three points.
context.beginPath();
context.moveTo(canvasWidth/2 - x, this.padding);
context.lineTo((canvasWidth + this.width)/2 + gamma, this.padding + this.height - gamma);
context.lineTo((canvasWidth - this.width)/2, this.padding + this.height + this.innerBorder);
context.lineTo(canvasWidth/2 - x, this.padding);
context.closePath();
var trianglePath:GraphicsPath = new GraphicsPath(new Vector.(), new Vector.());
trianglePath.moveTo(canvasWidth/2 - x, padding);
trianglePath.lineTo((canvasWidth + iconWidth)/2 + gamma, padding + iconHeight - gamma);
trianglePath.lineTo((canvasWidth - iconWidth)/2, padding + iconHeight + innerBorder);
trianglePath.lineTo(canvasWidth/2 - x, padding);
Although beginning a path is slightly different, both JS and AS3 use the methods moveTo and lineTo.
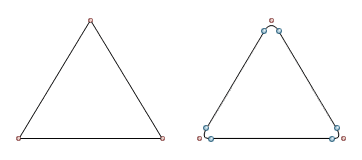
To
add a little complexity, let's round the corners of the triangle (and
we are not going to take the stroke shortcut I used in in my previous
article: HTML 5 Canvas Example).
To
round the corners we will use Bézier curves, which are supported by
both languages. The type of Bézier curve will be quadratic (opposed to
cubic). Quadradtic Bézier curves have two anchor points; the curve of the line between them is defined by one control point (Cubic Bézier curves have two control points).
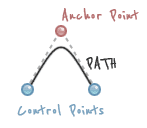
Adding a pair of control points at each corner will give a rounded effect.
// Create the triangular path (with rounded corners)
context.beginPath();
// Top Corner
context.moveTo(canvasWidth/2 - x, this.padding);
context.quadraticCurveTo(canvasWidth/2, this.padding - y, canvasWidth/2 + x, this.padding);
// Right Corner
context.lineTo((canvasWidth + this.width)/2 + gamma, this.padding + this.height - gamma);
context.quadraticCurveTo((canvasWidth + this.width)/2 + y, this.padding + this.height + this.innerBorder, (canvasWidth + this.width)/2, this.padding + this.height + this.innerBorder);
// Left Corner
context.lineTo((canvasWidth - this.width)/2, this.padding + this.height + this.innerBorder);
context.quadraticCurveTo((canvasWidth - this.width)/2 - y, this.padding + this.height + this.innerBorder, (canvasWidth - this.width)/2 - gamma, this.padding + this.height - gamma);
// Close Path
context.lineTo(canvasWidth/2 - x, this.padding);
context.closePath();
// Create the triangular path (with rounded corners)
var trianglePath:GraphicsPath = new GraphicsPath(new Vector.(), new Vector.());
// Top Corner
trianglePath.moveTo(canvasWidth/2 - x, padding);
trianglePath.curveTo(canvasWidth/2, padding - y, canvasWidth/2 + x, padding);
// Right Corner
trianglePath.lineTo((canvasWidth + iconWidth)/2 + gamma, padding + iconHeight - gamma);
trianglePath.curveTo((canvasWidth + iconWidth)/2 + y, padding + iconHeight + innerBorder, (canvasWidth + iconWidth)/2, padding + iconHeight + innerBorder);
// Left Corner
trianglePath.lineTo((canvasWidth - iconWidth)/2, padding + iconHeight + innerBorder);
trianglePath.curveTo((canvasWidth - iconWidth)/2 - y, padding + iconHeight + innerBorder, (canvasWidth - iconWidth)/2 - gamma, padding + iconHeight - gamma);
// Close Path
trianglePath.lineTo(canvasWidth/2 - x, padding);
JavaScript uses the method quadraticCurveTo on the HTML5 canvas to create the control point. ActionScript 3 uses the method curveTo.
Create the Inner Stroke Path
Next
we create a smaller triangle within our first triangle. Later we will
stroke it and utilize standard properties to curve the border of our
stroke for us.
// Create the inner border path
context.beginPath();
context.moveTo(canvasWidth/2, this.padding + this.lineWidth);
context.lineTo((canvasWidth + this.width)/2 - this.lineWidth, this.padding + this.height - this.lineWidth/2);
context.lineTo((canvasWidth - this.width)/2 + this.lineWidth, this.padding + this.height - this.lineWidth/2);
context.lineTo(canvasWidth/2, this.padding + this.lineWidth);
context.closePath();
// Create the inner border path
var strokePath:GraphicsPath = new GraphicsPath(new Vector.(), new Vector.());
strokePath.moveTo(canvasWidth/2, padding + innerBorder);
strokePath.lineTo((canvasWidth + iconWidth)/2 - innerBorder, padding + iconHeight - innerBorder/2);
strokePath.lineTo((canvasWidth - iconWidth)/2 + innerBorder, padding + iconHeight - innerBorder/2);
strokePath.lineTo(canvasWidth/2, padding + innerBorder);
Bang!
With any icon, we have a message. The warning standard is an exclamation point (aka
a "bang" character) which we add in the center of our icon. We could
use a text representation but we will not do that for a various reasons
(the user might not have that font, the size cost for embedding an
entire typeface just for one character is not worth it, etc.) 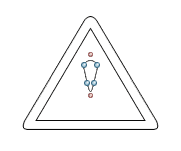
// Create the text (aka bang) path
context.beginPath();
// Top
context.moveTo(canvasWidth/2 - 8, this.padding + 45);
context.quadraticCurveTo(canvasWidth/2, this.padding + 35,  canvasWidth/2 + 8, this.padding + 45);
// Bottom
context.lineTo(canvasWidth/2 + 3, this.padding + 66);
context.quadraticCurveTo(canvasWidth/2, this.padding + 78, canvasWidth/2 - 3, this.padding + 66);
// Close path
context.lineTo(canvasWidth/2 - 8, this.padding + 44);
// Create the text (aka bang) path
var bangPath:GraphicsPath = new GraphicsPath(new Vector.(), new Vector.());
// Top
bangPath.moveTo(canvasWidth/2 - 8, padding + 45);
bangPath.curveTo(canvasWidth/2, padding + 35, canvasWidth/2 + 8, padding + 45);
// Bottom
bangPath.lineTo(canvasWidth/2 + 3, padding + 66);
bangPath.curveTo(canvasWidth/2, padding + 78, canvasWidth/2 - 3, padding + 66);
// Close path
bangPath.lineTo(canvasWidth/2 - 8, padding + 44);
Again the major difference between the two approaches are the methods quadraticCurveTo versus curveTo.
Exclamation 'Point'
To finish our bang character, we add a circle:
// Draw dot
var radius = 5;
var centerX = canvasWidth/2;
var centerY = this.padding + 84;
context.moveTo(centerX, centerY - radius);
context.quadraticCurveTo(centerX + radius, centerY - radius, centerX + radius, centerY);
context.quadraticCurveTo(centerX + radius, centerY + radius, centerX, centerY + radius);
context.quadraticCurveTo(centerX - radius, centerY + radius, centerX - radius, centerY);
context.quadraticCurveTo(centerX - radius, centerY - radius, centerX, centerY - radius);
context.closePath();
// Draw Dot
var radius:Number = 5;
var centerX:Number = canvasWidth/2;
var centerY:Number = padding + 84;
bangPath.moveTo(centerX, centerY - radius);
bangPath.curveTo(centerX + radius, centerY - radius, centerX + radius, centerY);
bangPath.curveTo(centerX + radius, centerY + radius, centerX, centerY + radius);
bangPath.curveTo(centerX - radius, centerY + radius, centerX - radius, centerY);
bangPath.curveTo(centerX - radius, centerY - radius, centerX, centerY - radius);
JavaScript and ActionScript have more efficient ways to create circles including the methods arc and drawCircle respectively.
Draw Inside the Lines
The paths are complete:
In
JavaScript and ActionScript and you won't actually see the path until
assign a fill or stroke to them. The following code defines what the
fills and strokes will look like:
// Background Gradient Fill
var backFill = context.createLinearGradient(0, this.padding, 0, this.padding + this.height);
backFill.addColorStop(0.55, this.primaryColor);
backFill.addColorStop(0.55, this.tertiaryColor);
backFill.addColorStop(1, this.secondaryColor + " transparent");

// Text and Stroke Fill
bangFill = context.createLinearGradient(0, this.padding, 0, this.padding + this.height);
bangFill.addColorStop(0, "#555");
bangFill.addColorStop(1, "#333");

// Stroke
context.lineWidth = this.lineWidth;
context.lineJoin = "round";
context.strokeStyle = bangFill;
// Background Gradient Fill
var backFill:GraphicsGradientFill = new GraphicsGradientFill();
backFill.colors = [secondaryColor, tertiaryColor, primaryColor];
backFill.ratios = [iconHeight/2, iconHeight, iconHeight];
backFill.matrix = new Matrix();
backFill.matrix.createGradientBox(iconWidth, iconHeight, 3*Math.PI/2, 0,  padding);

// Text and Stroke Fill
var bangFill:GraphicsGradientFill = new GraphicsGradientFill();
bangFill.colors = [0x555555, 0x333333];
bangFill.matrix = new Matrix();
bangFill.matrix.createGradientBox(iconWidth, iconHeight, Math.PI/2, 0, padding);

// Transparent Fill
var transparentFill:GraphicsSolidFill = new GraphicsSolidFill();
transparentFill.alpha = 0;

// Stroke
var stroke:GraphicsStroke = new GraphicsStroke(lineWidth);
stroke.joints = JointStyle.ROUND;
stroke.fill = bangFill;
Draw
// Fill the background path
context.fillStyle = backFill;
context.fill();

// Stroke the inner border path
context.stroke();

// Fill the bang path
context.fillStyle = bangFill;
context.fill();
// Fill and stroke all paths
var iconGraphics:Vector. = new Vector.();
iconGraphics.push(backFill, trianglePath, bangFill, bangPath, transparentFill, stroke, strokePath);
graphics.drawGraphicsData(iconGraphics);
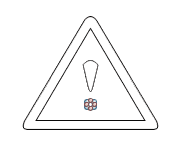
JavaScript
applies the path fills on the HTML5 Canvas as each one is completed.
ActionScript 3 can apply all path fills and strokes all at one time
using the method drawGraphicsData.
We see the results below:
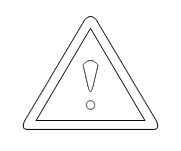
A Subtle Shadow
We are almost there, but there is something missing. Let's add a subtle shadow.
// Add a subtle shadow
context.shadowOffsetX = 0;
context.shadowOffsetY = 0;
context.shadowBlur = 10;
context.shadowColor = "#000000";
// Add a subtle shadow
filters = new Array(new DropShadowFilter(0, 0, 0x000000, 1, 10, 10));
Final Images
Download Source
References
|