


Guest, enregistrer login
 Ce libre JavaScript article vous montrera comment ajouter onclick événements à la RadioButtonList contrôles ASP.NET rapidement et facilement.
I've been fighting to add javascript code to the onclick event of ASP.NET RadioButtonList controls for the last hour, and given the frustration it caused me, I am writing the solution up for future reference. The real world code I am writing is far more complex than this example, but hopefully this illustrates enough to act as a primer, and to jog my own memory in future.
It's actually quite simple. For the example, I'm going to make a RadioButtonList make a Textbox dynamically appear and disappear.
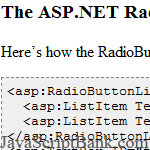
Here's how the RadioButtonList might look...
<asp:RadioButtonList ID="rblFoo" runat="server" RepeatLayout="Flow" RepeatDirection="Horizontal">
  <asp:ListItem Text="Show" Value="show" />
  <asp:ListItem Text="Hide" Value="hide" />
</asp:RadioButtonList>
<asp:TextBox ID="tbFoo" runat="server"></asp:TextBox>
Here's a javascript function that we are going to attach to the onclick event of each radio button (you would typically put this in a javascript file, and reference it via a SCRIPT tag in your ASPX page)
function fooClick(option_value,tb_id){
  var textbox_object = document.getElementById(tb_id);
  if (option_value == 'show'){
    textbox_object.style.display = 'block';
  } else {
    textbox_object.style.display = 'none';
  }
}
In the OnLoad() event of your page, do the following;
foreach(ListItem li in rblFoo.Items){
  li.Attributes.Add("onclick","fooClick('" + li.Value + "','" + tbFoo.ClientID + "');");
}
The important point to realise is that ASP.NET Server controls typically get assigned their ID and Name dynamically at runtime. The last part of this solution solves that by attaching the javascript to the objects on the server side, where it knows the ClientID it has already generated for the control we want to interact with.
1 votes / 55,757 previews / 0 commentaire
20/01/2010
Ce libre JavaScript article vous montrera comment ajouter onclick événements à la RadioButtonList contrôles ASP.NET ...Adding Javascript OnClick Events to ASP.NET RadioButtonList Controls - Adding Javascript OnClick Events to ASP.NET RadioButtonList Controls - Langue: Française
Définir comme page d'accueil - Ajouter aux Favoris - Recommandez-nous - Newsletter - Google+


 20/01/2010
 0
0